
 Back to Blog
One of the most daunting tasks in designing a drone is figuring out where to start. Do you start with the payload? The overall mass? Do you pick the propellers first?
Challenges linked to component selection quickly emerge - perhaps the motor is too powerful or the propellers are too small, the list goes on. But as the ancient proverb goes: “A journey of a thousand miles begins with a single step.”
To help you get past that first critical phase, this article demonstrates a simple method for succeeding in one of the most crucial early tasks: matching your motor and propeller.
And to make things even easier, we’ve developed a motor-propeller matching calculator that you can use for your own calculations.

Figure 1: Motor-propeller matching calculator on Google Sheet
We will walk you through how to use it below.
Table of Contents:
1. Introduction
2. How to Calculate Thrust
1. Calculating Max RPM and Thrust at Mach 0.7
2. Calculating Electrical Power
3. Calculating Mechanical Power
4. Voltage and Current
5. Calculating Torque
3. How to choose the right propeller or motor?
1. Choosing the right motor KV
2. Adjusting the voltage supplied
3. Go with a larger propeller or smaller propeller?
4. Theoretical vs Reality
4. Conclusion
How to Calculate Thrust
Because drone design and motor-propeller matching is an iterative process, certain assumptions are made early on then later iterated to reach a more accurate model for your drone.
We will use an example drone throughout this article to help demonstrate the process.
The easiest way to start is with the MTOW (Maximum Take-Off Weight) of the drone, which we will say is 25 kg. Assuming this is a quadcopter, the total thrust of all four powertrains should generate 2 times the MTOW (50 kg), so each powertrain needs to generate around 12.5 kgf (122.6 N) of thrust.
An in-depth explanation of how this number was achieved is explained in a previous article: Drone Design - Calculations and Assumptions.
To achieve this thrust, we can check the Tyto Robotics database or propeller manufacturer datasheets to determine which prop size would be able to achieve these thrust requirements without overspinning or underspinning them.

Figure 2: Tyto Robotics Database
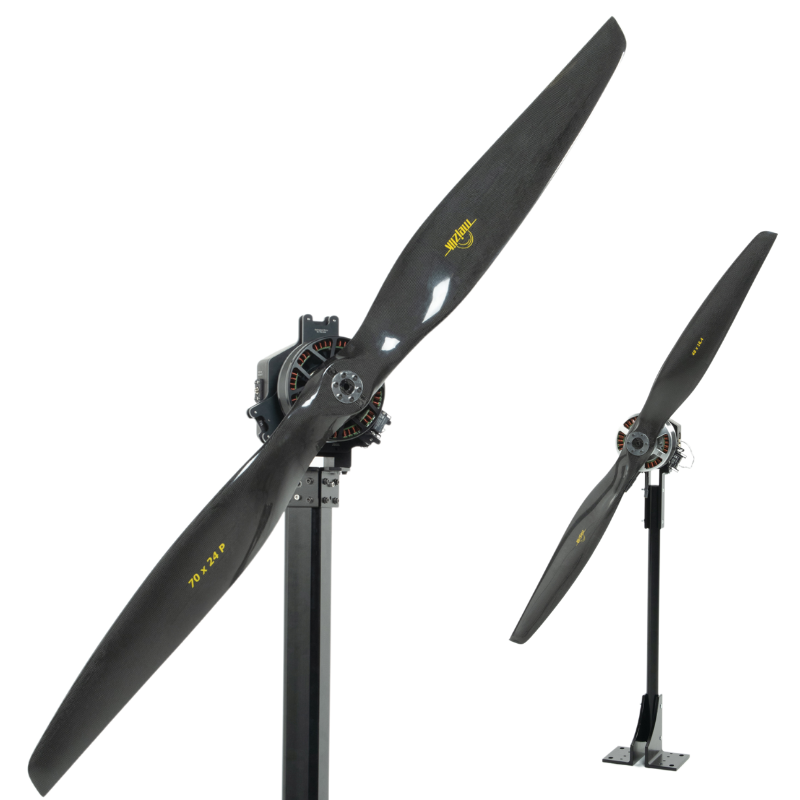
Given the weight of our drone, a good starting point is the Mejzlik 30x10 propeller, as the datasheet claims it can generate up to 34.9 kgf of thrust.
The next assumption we will make is the battery configuration. For 12.5 kgf, supposing that we could achieve 4 gf/W of overall efficiency, the system would require 3,125 W of electrical power to maintain its rotation lift. We could achieve 3,125 W with the one of following configurations:
22.2 V, 140 A → 6 S
44.4 V, 70 A → 12 S
51.8 V, 60 A → 14 S
81.4 V, 38 A → 22 S
As we don’t want to operate with excess voltage or current, let’s start with a 12S battery that has a nominal voltage of 44.4 V.
If you want to learn more, check out our in-depth article explaining different battery types and their configurations: A Guide to Lithium Polymer Batteries for Drones
The next assumption concerns the motor. In order to reach the thrust requirement of 12.5 kgf from a single propeller, a 30” propeller needs to operate at around 3,500 RPM, therefore, a 115 KV motor should work well.
The KV can be entered into the calculator to find the theoretical and physical maximum RPM of the motor and propeller combination. An immediate red flag to look out for occurs when the physical maximum RPM is lower than the RPM required to meet the thrust requirement.
Using the calculator, you can adjust the voltage and the KV of the motor to increase the theoretical and physical maximum RPM of your motor.
Calculating Max RPM and Thrust at Mach 0.7
Going through the calculator column by column, after inputting your propeller parameters (blade number, diameter and pitch), the next column is the “RPM at Mach 0.7”.
A propeller’s maximum practical RPM is limited by its blade tip Mach number. For efficiency and to avoid compressibility losses, designers typically keep tip speeds below Mach 0.7 or 0.8 on the ground. The corresponding RPM depends on the propeller diameter and operating conditions, so this limit can be used to estimate an upper bound on propeller RPM.
RPM (revolutions per minute) is the number of complete rotations of the propeller per minute. If expressed in terms of linear motion at a given radius, it can be written as the total distance traveled per minute divided by the distance traveled per revolution (the circumference at that radius).

At Mach 0.7, the propeller tip speed is 70% of the local speed of sound. At sea level, where the speed of sound is about 340 m/s, this corresponds to roughly 238 m/s.

Then we convert m/s to m/min.


Then we can find the maximum RPM:

We can use yet another online calculator to determine the maximum thrust generated by our propeller at Mach 0.7, this time entering the maximum RPM, propeller size and propeller characteristics. The calculator will display an estimated thrust generated by this propeller at the entered RPM.
In our case, at 5,974 RPM, our 30x10 propeller can generate around 337 N or 34.36 kg of thrust.

Figure 3: Online propeller thrust calculator
We can enter this number in column E of the calculator.
Calculating Electrical Power
The next column in our calculator, column F, is the estimated electrical power required to reach the estimated thrust. As a general rule of thumb, we can assume powertrain efficiency of 3.5 gf/W at full speed. This value is a conservative, order-of-magnitude design assumption commonly used in drone design.
The math for this step is straightforward. Simply divide the maximum thrust by the assumed electrical efficiency, and this gives us the electrical power required to drive this propeller at Mach 0.7 speeds.

Calculating Mechanical Power
The next column, column G, calculates the mechanical power required to drive the propeller. Here we make another assumption: there is 90% efficiency between electrical power input and mechanical power output.

Voltage and Current
In column H, we will enter the nominal voltage of our 12S battery, which is 44.4 V. We can calculate the current requirement (column I) in amps by simply dividing the estimated electrical power (column F) by the input voltage (column H).

Calculating Torque
The next variable, in column J, is the torque. The formula for torque is written as:

The angular velocity in RPM needs to be converted to rad/s which can be done by:

We already calculated mechanical power in the previous step, so the torque can then be found through simple division:

How to choose the right propeller or motor?
There are thousands of motor and propeller combinations to choose from, but the previous steps of theoretically determining what could be the best option for us has made this crucial step easier.
In the previous steps we narrowed down our options, now the next step is real world propulsion testing to see if our initial estimates hold up in the real world.
The Flight Stand 50 thrust stand can be used to test motors and propellers and gather information on current, voltage, thrust, torque and rotation speed.

Figure 4: Example of powertrain efficiency vs throttle graph of a 28x9.4 Mejzlik propeller
This may come as a surprise, but the Flight Stand can also be used like a dynamometer to generate a motor efficiency map; with multiple propellers or wind from a wind tunnel acting as the variable load. It’s a technique that is simpler and more cost effective than a traditional brake dynamometer, so we made a video demonstrating how to use propellers to map motor performance.
Fundamentally, what we’re trying to achieve is aligning the peak of the propeller efficiency curve with the peak of the motor efficiency curve as much as possible. A crucial part of aligning these graphs is ensuring that if the motor or propeller is swapped, the thrust requirement that we set initially is still met. Note that the torque and thrust can significantly change with any incoming airspeed.


Figure 5b: Efficiency vs rotation speed graph of a propeller and motor

Figure 5c: Thrust vs rotation speed graph of a propeller
The first graph in Figure 5a demonstrates how motor and propeller performance intersect on an efficiency vs. RPM plot. For the propeller, the torque requirement increases exponentially as the rotation speed increases. For the motor, the torque delivered drops linearly as rotation speed increases, assuming a constant voltage is applied. This relationship is represented by the motor KV and RPM equation:

Figure 5b shows the efficiency of the propeller and motor as unitless values in relation to rotation speed. It is important to note that the motor efficiency curve depends on both the rotation speed and the torque applied to the motor. Therefore, multiple variations of this graph must be taken into account when comparing the propeller and motor.
Figure 5c is a simple thrust versus rotation speed graph of the propeller. To see how the propeller and motor behave, a straight line is drawn from the bottom graph at the chosen RPM that meets the thrust requirement. This line is extended upward to show the points of intersection on each of the graphs.
As you’ll see from our video, a typical motor efficiency plot has two variables affecting the efficiency of the motor. The x-axis represents the motor rotation speed and the y-axis represents the torque. Within this range of speed and torque, the motor efficiency is displayed as a heat map. Figure 6 below is an example that shows the torque generated by the motor, rotation speed and the efficiency of the motor.

Figure 6: Motor efficiency map using multiple propellers and a WindShaper
A good motor-propeller match occurs when the point of highest efficiency of the propeller is aligned with the point of highest efficiency of the motor.

Figure 7: Efficiency vs rotation speed graph of a well matched propeller and motor
Figure 7 above shows a well matched propeller and motor while figure 8 shows a poorly matched one. 
Figure 8: Efficiency vs rotation speed graph of a poorly matched propeller and motor
Matching a motor and propeller does not guarantee that the system meets performance requirements. At a given operating point, a propeller may achieve high efficiency but fail to generate the required thrust. Since thrust is a fixed requirement, this often requires the designer to accept a reduction in efficiency or select a different propeller or motor.
Choosing the right motor KV
Adjustments typically begin with the motor KV. Many suppliers sell motors with the same geometry and weight, but with different windings to provide a new KV. This allows you to swap them out to get a different KV while still retaining the same weight and geometry of the drone design.
Starting with swapping motors (rather than propellers) can facilitate your optimization process as there is little change to cost and design. In comparison, changing the pitch or diameter of a propeller can significantly change the design of the drone, affecting the center of gravity, weight and layout.
The KV of a motor determines the work required to generate torque, defined by this relationship with the motor’s torque constant (KT).

When KV decreases, KT increases, which gives the motor more mechanical leverage per rotation. In the case of a large propeller like the 30”, the torque required to spin the propeller increases exponentially as the diameter increases. To compensate for this increased torque requirement, picking the right motor that is able to provide this torque is crucial in matching the motor to the propeller.
In a well matched motor and propeller, the immediate benefit is the reduction in heat loss in the motor. Electrical loss in a motor is calculated by:

Where P is the electrical losses in Watts, I is the current in Amps and R is the internal resistance of the motor in Ohms.
In a powertrain with lower KV, more voltage is required to reach the same RPM, which means lower current is drawn. Because current is squared in this equation, any reduction in current results in an exponential drop in electrical losses. In other words, a lower KV motor can generate the same torque as long as a high voltage is supplied which results in less current draw.
In some cases, switching to a motor with lower KV can offer more ‘headroom’ in the throttle control. Since the maximum achievable RPM is higher, you could set the hover point of your drone at 60% to 70% throttle point and still have up to 40% of throttle left to make quick maneuvers or to balance in high wind conditions.
Adjusting the voltage supplied
The voltage supplied to the powertrain is the next component that can be adjusted.
As mentioned, the maximum RPM of a motor depends on the KV and the voltage.
If the KV remains constant, the voltage can be adjusted to change the maximum RPM. Increasing the voltage increases the maximum rotation speed of the motor and the propeller. This relationship allows for fine tuning the maximum RPM and the throttle headroom of the powertrain.
If a motor is replaced with a lower KV model, the maximum rotation speed will decrease, assuming the voltage remains constant. This can be compensated by increasing the voltage supplied to the motor.
Increasing the voltage also benefits the system by lowering electrical losses. According to the electrical losses equation above, as voltage increases, the current supplied to the motor decreases. This leads to an exponential decrease in electrical losses. Conversely, decreasing the voltage may cause electrical losses to increase exponentially.
Many battery suppliers offer packs with similar geometry and weight at different voltages. This allows for parts to be swapped without altering the weight or the physical design of the drone.
Go with a larger propeller or smaller propeller?
Once the electrical components are optimized, further adjustments can be made to the propeller. The most accessible property to change is the propeller pitch. Adjusting the pitch alters the aerodynamic characteristics of the propeller and determines how much thrust is generated per rotation. This change in thrust directly influences the torque requirements, which affects the efficiency of the motor.
In a scenario where a motor has a low KV and no higher KV alternative is available, the motor may be too powerful for the current propeller. In this case, increasing the pitch provides the motor with the necessary torque load without changing the physical dimensions of the drone. By matching the torque requirement of the motor, the powertrain can be brought into a more efficient operating range.
The propeller diameter is typically the final adjustment step because changing it alters the physical dimensions of the drone and may shift the center of gravity. If the design allows for diameter adjustments, the relationship is similar to that of the pitch. Increasing the diameter increases the thrust generated, but it also increases the torque requirements. Because torque requirements scale exponentially with diameter, even minor adjustments can significantly impact the performance of the powertrain.
Conversely, decreasing the propeller diameter reduces the torque required at a specific RPM. However, to meet a fixed thrust requirement with a smaller propeller, the rotation speed must be increased. This higher rotation speed increases the torque and power demands on the motor. Selecting the correct diameter is therefore a matter of balancing the physical constraints of the drone frame with the torque capacity of the chosen motor.
Theoretical vs Reality
Another thing to consider is dynamic versus static testing. It is highly recommended that dynamic testing is performed with the propellers that you are evaluating. Propellers behave very differently with and without incoming air speed.
Further Reading: Static vs Dynamic Drone Testing
Finally, the efficiency of the entire configuration of the propulsion system can be expressed in gf/W. This value can be used to find the flight time of the drone using a calculator like this one.
After all this, when motors and propellers are tested in real world conditions, the results are always different from what was predicted theoretically. The Flight Stands and WindShaper was made to tackle this very problem of testing propulsion systems in various conditions in an accurate way.
Conclusion
Designing a propulsion system is a long and delicate balancing act of finding the right motor, propeller, ESC, battery, weight and the size of the drone. As demonstrated, a single change in one of the variables pushes you to reiterate all the other components of the drone. The goal is to reduce as much power consumed as possible in order to increase flight time.
By using the propeller utilization calculator to narrow down our propeller and motor selection, validating the results with static and dynamic testing on a Flight Stand with a WindShaper, you can move away from guesswork and be able to build a drone with a truly matched propeller and motor.


Leave a comment