
 Back to Blog
General setup
Step 1.Go to the “Hardware” tab and apply the safety limits to protect your equipment.

Step 2. Go to the “Powertrains” tab and map all the elements of the powertrain.

Step 3 (optional). Quick throttle changes can damage equipment from high torque and high current. You can protect your hardware by adding a rate limiter. Go to the “Manual Control” tab and put a value for the rate limiter. It is applied to all output changes including when a cutoff occurs. 0 disables the rate limiter.
Manual Control
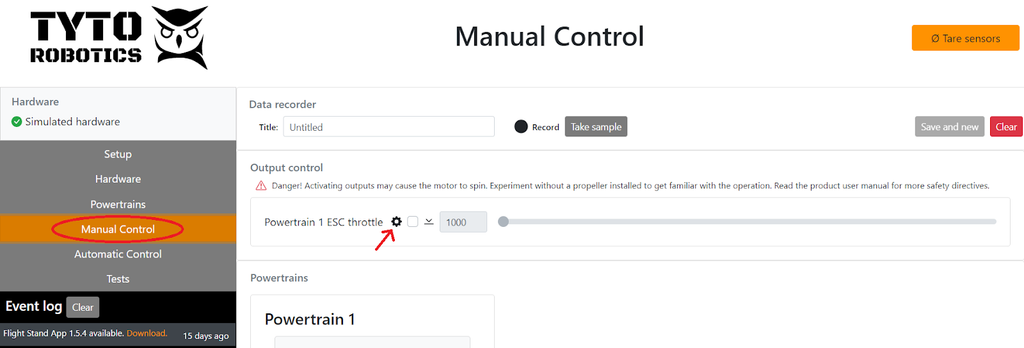
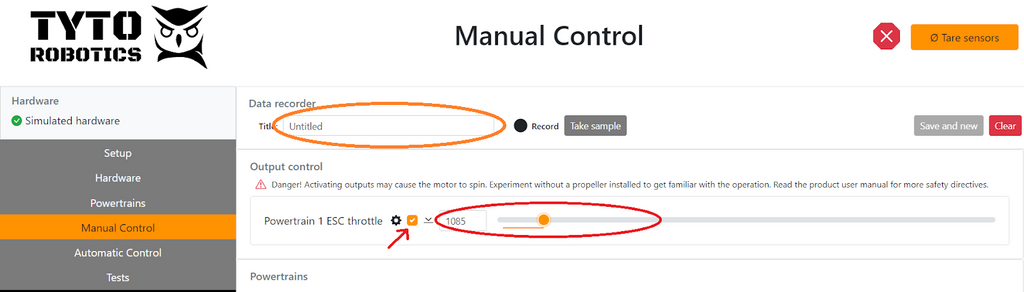
Step 1. Go to the “Manual Control” tab, set a title for the test, start recording, activate the output and control the ESC.
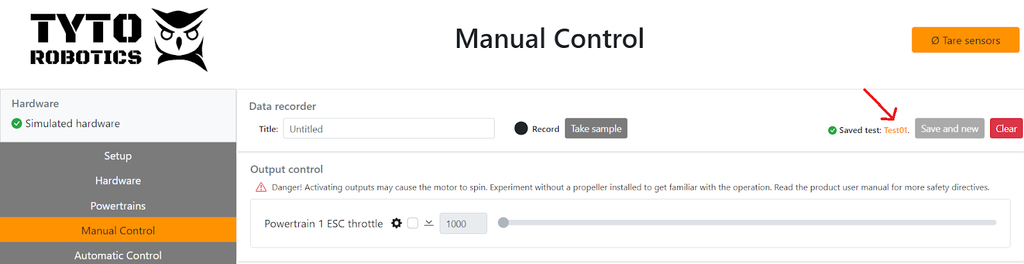
Step 2.Once you’ve done your test, you can stop the motor and save the recording. Click the test to go to the Test tab.
Step 3.Export the CSV file using the "Export" sub-tab.

Automatic Control
Step 1.Go to the “Automatic Control” tab and select either Steps or Ramp depending on what test you want to run.
Step 2.You can either load default values by pressing the button, fill the table by hand or import a CSV. If you want to import a CSV file, it needs to be in the same template as the exported version. We recommend that you export a blank CSV and put your data inside.
Step 3. IMPORTANT: Activate the output in the “Manual Control” tab. The output is not activated automatically by the wizard for safety reasons.
Step 4.Once you have activated the output, configure the test builder, select the number of sequences you want and then click on the “Run” sub-tab.

Step 5.Click on start to run the sequence.
Step 6.Once the test is done you can click on the test title next to “Saved test :” to see your test, or go to the Tests tab.
Step 7.In the "Test" tab, export the CSV file using the "Export" sub-tab. Use the Export to CSV button at the bottom right.